Showing posts with label CT. Show all posts

Friday, November 27, 2015

:PTU Christmas Cheer

Mellie Beans Scraps
PTU Christmas Cheer
Purchase HERE


My CT Tags and Tutorials


CT Timeline Set by Amy (Amy Marie Tag Creations)


CT Tag by Sonja ( Sonja Sazzy World)

CT Tag by Ann (Foxy Designz)


Monday, November 23, 2015

PTU Decembrrrrr

Mellie Beans Scraps
PTU Decembrrrrr
Purchase HERE


My CT Tags and Tutorials

CT Tutorial by Fi (Just Fi)
View tutorial HERE

CT Tag by Jacqueline (JBeths Designz) 

Friday, July 17, 2015

CT Rotation Alicia Mujica - Tara

CT Rotation for Alicia Mujica using the new tube, Tara! You can purchase this adorable tube by visiting Alicia Mujicas store

I am also using my kit: Garden Party, which you can find for 50% off!! http://www.mysticalscraps.com/index.php?main_page=product_info&cPath=7_221&products_id=12049&zenid=19bpokqotmvlndun4046fttdf1


Tag 01


Tag 02, using my The Art of Calm kit, and tutorial, Calming, by Fi


Tag 03. Scrap kit by Monti. Animations by Simone


Wednesday, June 3, 2015

CT Rotation for Alicia Mujica - Butterfly


CT tags for Alicia Mujica, using both her kit, and tube.
Tube: Butterfly here: http://aliciamujicadesign.com/gb/190-butterfly-por-alicia-mujica-2015.html

Kit: Secret Garden here: http://aliciamujicadesign.com/gb/191-kit-secret-garden-por-alicia-mujica-2015.html


CT  work for Alicia Mujica


Tag 01


Tag 02 (Facebook Timeline set)


Tag 03


Friday, October 24, 2014

CT tags for CCS


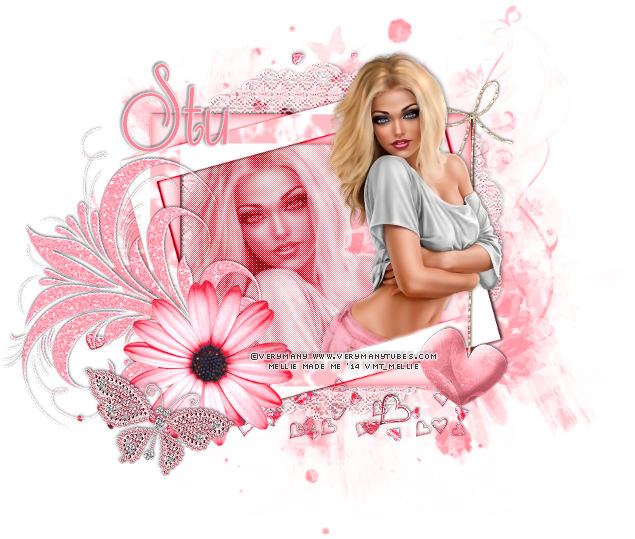
2 CT tags for Stu, using his brand new kit: IB-Jamie Kidd 65-3, and the art of Verymany. This is a VERY pink tag...LOL You can find the kit here 
The tube here

Thursday, August 14, 2014

CT tags for CDO and Rebel Dezigns


New CT tags for CDO and Rebel Dezigns using her Inspired By kit: IB-PinUp ToonsJune2014-bt which you can find here, the art of PinUp Toons, bonus tube for June, which was purchased at CDO here

You can click the images to enlarge them :)

Monday, July 14, 2014

CDO CT Tags for Hungry Hill


New CT tags for Alison Sarah Hungry - Hungry Hill Scrap. I used her kit Tuesday Afternoons and the artwork of Pinup Toons You can find this awesome scrap kit here:http://www.cdoestore.com/index.php?p=product&id=42816&parent=497 And the tube can also be found at CDO here: http://www.cdoestore.com/index.php?p=product&id=41442&parent=216 And here: http://www.cdoestore.com/index.php?p=product&id=34368&parent=216

Wednesday, June 4, 2014

CDO CT Tags for Foxy Designz

CDO CT Tags for Ann/Foxy using her kit.
Purple Fantasy-mini, and the artwork of Anna Liwanag.
Purchase Tube HERE
Purchase Kit HERE


Wednesday, May 28, 2014

Sew Adorable - CT Tag for Monti

This adorable scrap kit MEGA can be purchased at CDO, by Monti's Scraps. 
And the amazing tube to go along with it by Michi
It is also a mega tube, which has several layers for you to play with!


Saturday, May 3, 2014

2 new tags for TammyKat

I used TammyKat's IB PinupToons kit -82-2 for these 2 tags.
The kit can be purchased, along with the tubes at CDO store here:
Kit: http://www.cdoestore.com/index.php?p=product&id=41788&parent=488
Tube: http://www.cdoestore.com/index.php?p=product&id=41443&parent=216
Tube: http://www.cdoestore.com/index.php?p=product&id=41444&parent=216


Friday, April 4, 2014

2 CT Tags - Schnegge Scraps


These lovelies were made using a new PTU kit by Schnegge
It is available for purchase, along with the Tubes by PinUp Toons, at the CDO store


Tuesday, April 1, 2014

CT Tutorial for Monti Scraps

Have you seen the new bonus tube for April, from PinUp Toons? She's deliciously adorable and I am totally in love. I had to have her, so I bought myself 2 tube packages that were new for this month. One is themed for Easter, but the other one is themes with tiny little fairy girls and I feel so lucky to have them!

Here is a new tag that I made for Monti (CT Tag), using her new IB-PinUp Toon April bonus tube kit! It's available to purchase HERE at CDO store, as well as the new tubes from PinUp Toons!

Isn't she just the sweetest lil thing?!?!


Monday, March 31, 2014

CT Call!

Are you a tutorial writer? Like getting kits, free? Can you write at least one tutorial per kit, and advertise on Facebook ad groups, and/or Yahoo ad groups? Then email me!
Free kits, what are you waiting for?!?!

Wednesday, March 5, 2014

CDO CT Tutorial- Monti Scraps-Sweet Treats


You can click on the image to see it full sized :)
Thank you for taking the time to do my tutorial. I hope you enjoy it, and would love to see your results, and receive your feedback! This tutorial was written by Mellie on March 5, 2014 and is copyright to me, the way I word thing's and the images that I use. All other images are copyright to their respective owners, including tubes/art, font, scrapkits and templates and should not be used without purchasing or written permission, nor without reading their terms of use. This tutorial is for education purposes only and is in no way intended to be used as any other purpose. This tutorial was written with the tube and kit in mind that is being shown, therefore, you may have to adjust your setting's should you choose to use images not suggested here, in this tutorial. For this tutorial, you will need to know several things. Paint Shop Pro (I am using version X), and a good working knowledge of how to operate it, layer palettes and plug-in filters, masks, templates...etc. I will also assume that you add your desired drop shadows to each and every layer. :)

For this tutorial, you will need the following items:
DSB Flux - plug in filter
Kit by Monti
Tube by VeryMany
Millie's Template # 482
Mura's Meister - Copies
Vaybs Mask 89
Font of choice. I am using Bank Gothic and Cheri

Let's begin! :)

1) Open the template by Millie, duplicate (shift + D), close original. Click layer cr and delete. Unhide the background layer and click on layer 1.

2) Selections>select all>selections>float. Flood fill with color #f49ab6, add DSB Flux with setting of 30, mixed checked. 
3) Selections>Modify>Contract>5 and flood fill with paper 4 at 50%. Deselect.
4) Click layer 2, selections>select all>selections>float, flood fill with color #6f4334. Selections>modify>contract>5 pixels and flood fill with paper 1. Deselect.
5) Click layer 3, selections>select all>selections>float, flood fill with color#f5cdd2, add bright noise, selections>modify>contract and flood with color #915948. Continue this with each layer of the template until you have completed all of the layers. Don't forget to drop shadow each of them as well.
6) Click layer 3, the largest of the rectangles. Open your tube close-up and copy/paste as a new layer onto your canvas, resize to 50%. Use your magic wand to select the brown portion of the rectangle, selections>invert and making sure you're on your tube layer tap delete to crop off the overlapping pieces of the tube. Deselect. In the blend mode for the tube layer, choose Luminance (L). Click on layer 3 again.
7) Grab your text tool (I'm using Bank Gothic 14 pixels, VECTOR checked) and type out the word "Scrumptious" then click objects>align>center in canvas. Convert to raster layer and go to Muras copies with the drop down set on tiling, change the number beside "gap" to 2 and top "number" to 1, leave everything else, click ok. Now on layer 3, selections>select all>selections>float click the text layer, position inside the "marching ants" as desired, and tap delete on keyboard. Deselect.
8) Do this same procedure for any other layers you desire :)
9) Open Mini-Element 22 and copy/paste as new layer. Resize to 85%. Position at lower portion of frames. 
10) Open Mini-Element 27 and copy/paste as new layer. Resize to 50% and place over the layer 6(circle) I changed blend mode to Luminance (L).
11) Copy the full body portion of the tube and paste as a new layer, top layer. Resize to 50%.
12) Hide, or delete the white background layer. Open your mask. Open paper 6 copy/paste as bottom layer. Layers>new mask layer>from image and choose the name of the mask in drop down menu. Make sure that invert mask data is UNchecked, click ok. Layers>merge>group. Resize layer to 85%.
13) Open wordart, copy/paste as new top layer. Resize to 35%, sharpen and position top left. 

14) Add your copyright information. Add any other text you'd like to. I am using  Cheri font. Merge layers. Copy/paste as new image and flatten.
15) Save as and you are done!
Thank you for doing this tutorial. I'm glad you stopped by. I hope to have more tutorials in the near future, so keep checking back. :)

Other version using a tube by Markia :