Showing posts with label PinupToons. Show all posts

Sunday, November 8, 2015

CDO PinupToons IB 216-1

Mellie Beans
CDO PinupToons IB 216-1
Purchase HERE


My CT Tags and Tutorials

CT Tag by Jacqueline ( JBeth Designz )


Facebook Timeline by Amy ( Amy Marie's Tag Creations )

CT Tag by Michele ( Always Creations )


Friday, October 23, 2015

CDO IB Pinuptoons 180-3

Mellie Beans Scraps
CDO IB Pinuptoons 180-3
Purchase HERE


CT Tags and Tutorials

CT tutorial by Amy ( Amy Marie's Tag Creations )
view tutorial HERE

Friday, October 2, 2015

CDO IB-Pinuptoons 223-2

Mellie Beans
CDO IB- Pinuptoons 223-2
Purchase HERE


My CT Tags and Tutorials

CT Tag by Marcia ( One Plus )


CT Tag by Sue (SmilinSue)


CT Tags by Lorraine ( My World on PSP )


Saturday, September 26, 2015

CDO IB Pinuptoons 224-1

Mellie Beans Scraps
CDO Inspired by Pinuptoons 224-1
Purchase HERE


My CT Tags and Tutorials


CT Tag by Marcia ( One Plus Creations )


 Tutorial by  Michele ( Always Creations )
View tutorial HERE


Tuesday, September 15, 2015

CDO Inspired by Pinuptoons 180-3

Mellie Beans Scraps
CDO Inspired by Pinuptoons 180-3
Purchase HERE


My CT Tags and Tutorials

CT Tag by Ann ( Foxy's Designz )

Saturday, August 23, 2014

CDO CT Tags for Honored Scraps

I made these 2 tags for Patty/Honored Scraps using her kit: IB Rachel Anderson -20-1
The artwork of PinUp Toons, for both tags: PinUp Toons Package 197
Mask and Templates by Millie.


Friday, August 15, 2014

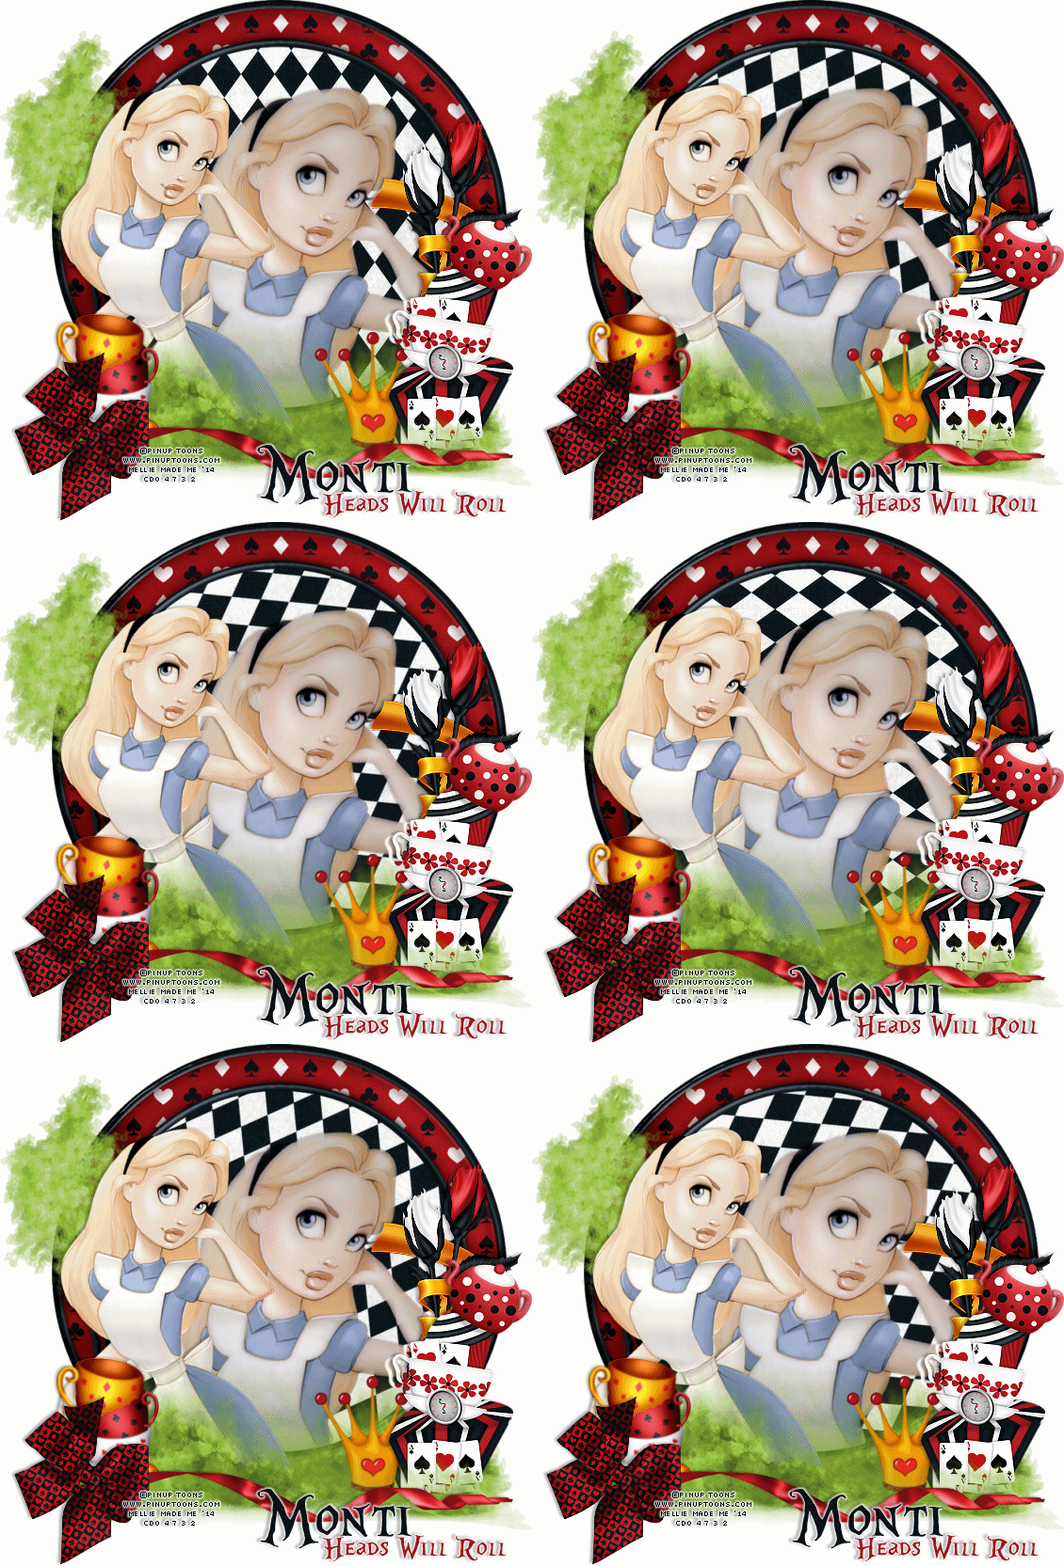
Heads Will Roll - Animated Tag Tutorial


You can click the tag image to enlarge it :)

Thank you for taking the time to do my tutorial. I hope you enjoy it, and would love to see your results, and receive your feedback! This tutorial was written by Mellie on August 15, 2014 and is copyright to me, the way I word thing's and the images that I use. All other images are copyright to their respective owners, including tubes/art, font, scrapkits and templates and should not be used without purchasing or written permission, nor without reading their terms of use. This tutorial is for education purposes only and is in no way intended to be used as any other purpose. This tutorial was written with the tube and kit in mind that is being shown, therefore, you may have to adjust your setting's should you choose to use images not suggested here, in this tutorial. For this tutorial, you will need to know several things. Paint Shop Pro (I am using version X), and a good working knowledge of how to operate it, layer palettes and plug-in filters, masks, templates...etc. I will also assume that you add your desired drop shadows to each and every layer. :)


You will need the following in order to duplicate my tag:


PinUp Toons tube - HERE
Scrap Kit by Monti - HERE
PSP X or similar version
Animation Shop
Font of choice I am using Alice In Wonderland. :)
Xero - Porcelain and  Soft Vignette

Let's begin, shall we? :)

Open frame 1 provided in Monti's kit, duplicate ( shift + D) and close the original. Resize the frame to about 80%, all layers unchecked.

Open paper 2, and set it as your background fill. Close your foreground fill and using your preset tool, ellipse, draw out a circle (hold down shift for a perfectly round circle) about 472 pixels. Convert to raster layer and place as bottom layer, in layer palette. Duplicate this layer so that you have a total of 4 layers. Close the paper, we're done with it.

Click the second layer of paper you created and go to Image>Free rotate. Click on right, then click free and type in 30, uncheck the 2 boxes at the bottom and click on OK.
Repeat this same step for the next two layers, only change the rotation to 60 and 90. Leave the original paper as is.

Now, let's start decorating our tag :)Add the largest tube layer, over your paper layer, and resize accordingly. Apply Xero Vignette and Xero Porcelain with these settings:


I will leave this part to you and your taste mostly. I am using some of the same elements that are on the frame. I have moved, placed and resized them and made it look as if she's behind them, to help cover the part that is cut off. Just use your pick tool to drag and resize those 3 elements.

Now, let's add some more elements:

Element 36 across the top layer Element 31 top layer, left
Element 30 layer above the frame.
Now, let's work on adding our copyright information and name or text. I am using a font called Alice In Wonderland at 72 pt. in black. I am also adding a stroke of white to mine :)
Add your copyright information.
Once you have everything in place, and the way that you like it, we need to start on the animated portion of the tag.

Click the first paper layer you created on the tag. Hide the other 3 copies of it, and merge visible. Copy/paste as a new image in PSP, merge all, flatten, then copy/paste into animation shop.

Go back to psp, undo merge, hide current layer and click on the next layer, merge visible and copy/paste as new image. Flatten. Copy/paste into animation shop, but click on edit> paste after current frame.

Go back to psp, undo merge, hide current layer and click on the next layer, merge visible and copy/paste as new image. Flatten. Copy/paste into animation shop, but click on edit> paste after current frame.

Do this until you've used all 4 layers.

Now, in animation shop highlight the 2 middle frames by using your arrow keys on your keyboard and pressing shift. Copy. Then highlight the last frame and go to edit>paste after current. You should have a total of 6 frames now.

Save your image and you are done!

Thank you for taking the time to do my tutorial. I hope to offer more in the future, so keep checking back!

Thursday, August 14, 2014

CT tags for CDO and Rebel Dezigns


New CT tags for CDO and Rebel Dezigns using her Inspired By kit: IB-PinUp ToonsJune2014-bt which you can find here, the art of PinUp Toons, bonus tube for June, which was purchased at CDO here

You can click the images to enlarge them :)

Friday, June 13, 2014

Red Riding Hood Tutorial


You can click the image to see it in full size.

Thank you for taking the time to do my tutorial. I hope you enjoy it, and would love to see your results, and receive your feedback! This tutorial was written by Mellie on June 12, 2014 and is copyright to me, the way I word thing's and the images that I use. All other images are copyright to their respective owners, including tubes/art, font, scrapkits and templates and should not be used without purchasing or written permission, nor without reading their terms of use. This tutorial is for education purposes only and is in no way intended to be used as any other purpose. This tutorial was written with the tube and kit in mind that is being shown, therefore, you may have to adjust your setting's should you choose to use images not suggested here, in this tutorial. For this tutorial, you will need to know several things. Paint Shop Pro (I am using version X), and a good working knowledge of how to operate it, layer palettes and plug-in filters, masks, templates...etc. I will also assume that you add your desired drop shadows to each and every layer. :)
You will need the following in order to duplicate my tag:

Kit by MontiScrap at CDO
Tube by Pin Up Toons at CDO
Font - Segoe Print
Mask 89 

Let's begin!

1) Open the mask. Open paper 2, duplicate (shift + D) and close he original. Apply mask, layers>merge>group. Image>resize 75%.

2) Open frame 1, copy/paste onto your canvas and close the original. Resize as desired. Take your magic wand and click inside the frame, and go to selections>modify>expand 3 pixels, add a new layer and fill with paper 2 at 50% size. Deselect and drag this layer below the frame layer.

3) Open element 5, copy/paste and close original, resize as desired. Position behind the frame, but above the mask layers. Repeat process with element 17, only position opposite the wolf. :)

4) Open your tube, copy/paste as new, top layer and resize as desired. I used my magic wand tool to select the area inside the frame layer, and then clicked my tube layer and selections>invert, to erase the pixels stuck outside of the frame. I wanted her to appear to be coming out of the frame. Deselect.

5) Open element 2, copy/paste as a new layer, just below the frame but above the tree layer. Resize as desired.

6) For the next step, I made a sort of cluster area on the bottom right of the frame. I used elements 21, 23 (mirror), 14, 8 and 20, in that order. I resized as needed and arranged. You can view my image as a guide.

7) Now, open the word art element, copy/paste as a new layer. Resize as desired and position to the bottom left.

8) Almost done! Add your name to the tag and your copyright information. Merge layers visible, copy/paste as new image and save as. That's it, you're done :)
Thank you for doing this tutorial. I'm glad you stopped by. I hope to have more tutorials in the near future, so keep checking back. :)

Saturday, May 3, 2014

2 new tags for TammyKat

I used TammyKat's IB PinupToons kit -82-2 for these 2 tags.
The kit can be purchased, along with the tubes at CDO store here:
Kit: http://www.cdoestore.com/index.php?p=product&id=41788&parent=488
Tube: http://www.cdoestore.com/index.php?p=product&id=41443&parent=216
Tube: http://www.cdoestore.com/index.php?p=product&id=41444&parent=216


Friday, April 4, 2014

2 CT Tags - Schnegge Scraps


These lovelies were made using a new PTU kit by Schnegge
It is available for purchase, along with the Tubes by PinUp Toons, at the CDO store


Tuesday, April 1, 2014

CT Tutorial for Monti Scraps

Have you seen the new bonus tube for April, from PinUp Toons? She's deliciously adorable and I am totally in love. I had to have her, so I bought myself 2 tube packages that were new for this month. One is themed for Easter, but the other one is themes with tiny little fairy girls and I feel so lucky to have them!

Here is a new tag that I made for Monti (CT Tag), using her new IB-PinUp Toon April bonus tube kit! It's available to purchase HERE at CDO store, as well as the new tubes from PinUp Toons!

Isn't she just the sweetest lil thing?!?!


Sunday, February 23, 2014

CDO CT Tutorial - Monti Scraps Pinuptoons IB-47-2


You can click on the image to see it full sized :)
Thank you for taking the time to do my tutorial. I hope you enjoy it, and would love to see your results, and receive your feedback! This tutorial was written by Mellie on February 23, 2014 and is copyright to me, the way I word thing's and the images that I use. All other images are copyright to their respective owners, including tubes/art, font, scrapkits and templates and should not be used without purchasing or written permission, nor without reading their terms of use. This tutorial is for education purposes only and is in no way intended to be used as any other purpose. This tutorial was written with the tube and kit in mind that is being shown, therefore, you may have to adjust your setting's should you choose to use images not suggested here, in this tutorial. For this tutorial, you will need to know several things. Paint Shop Pro (I am using version X), and a good working knowledge of how to operate it, layer palettes and plug-in filters. I will also assume that you add your desired drop shadows to each and every layer. :)

For this tutorial, you will need the following items:
PSP X, or similar version
My template (save as)
IB_PinupToons 47-2 kit, by Monti
This tube, by PinupToons
Mura's Meister Copies plug-in filter
Xenofex 1
VM Toolbox - Zoom Blur

Let's begin!
Open my template, shift + D, close original. Image>canvas size>650 X 650 pixels.
Open the 3 sheep elements from the kit. Copy one.
Using the magic wand tool, click a square of choice in the template, paste as new layer and resize this layer to 30%. Selections>invert, tap delete on sheep layer. Deselect. Continue the process until all 3 squares are filled in. Once you have them situated, merge>layers>visible.
Open element 27, the pink checked bow, copy/paste as new layer and resize to 83%. Place at bottom of template so that the sheep feet show.
Add a new layer, send to bottom, click your custom selection tool with this setting: top 236, left 60, bottom 480, right 590 and flood fill this selection with paper 3, I am using it at 75% original size. Deselect and apply Xenofex 1, shower door grid with default settings. Duplicate this layer. On the original layer, add VM Toolbox - Zoom blur with this setting: Amount 20 - Adjust 45.
Open word art, copy/paste as new layer, resize to 60%. Move to bottom left. Make sute it's the top layer.
Open your tube and copy/paste as new layer. Image>Mirror. Image>Canvas size 800 X 650 pixels. Resize the tube layer to 75%. Place the tube to the left of the frame images.
Add name, and any effect to name desired.
Add copyright information for your artist (s)
Merge visible, copy/paste as new to crop. Save as, and you're done!
Thank you for doing this tutorial. I'm glad you stopped by. I hope to have more tutorials in the near future, so keep checking back. :)


Friday, February 14, 2014

New Tag - Rebel Dezigns Kit

New tag using IB_Amy Matthews 
July 2013-bt kit for Rebel Dezigns!
Purchase kit HERE
Tube, by PinupToons can be found HERE
Thanks for looking


Monday, February 10, 2014

CDO Monti Scraps- J'aime Paris!


You can click on the image to see it full sized :)
Thank you for taking the time to do my tutorial. I hope you enjoy it, and would love to see your results, and receive your feedback! This tutorial was written by Mellie on February 10, 2014 and is copyright to me, the way I word thing's and the images that I use. All other images are copyright to their respective owners, including tubes/art, font, scrapkits and templates and should not be used without purchasing or written permission, nor without reading their terms of use. This tutorial is for education purposes only and is in no way intended to be used as any other purpose. This tutorial was written with the tube and kit in mind that is being shown, therefore, you may have to adjust your setting's should you choose to use images not suggested here, in this tutorial. For this tutorial, you will need to know several things. Paint Shop Pro (I am using version X), and a good working knowledge of how to operate it, masks, layer palettes and plug-in filters.

For this tutorial, you will need the following items:
Kit by Monti - at CDO
Tube by PinUp Toons - at CDO

Mask 39 by Moonbeams & Spiderwebs
Font of choice - I am using Cheri.

I will not give you every element placement on this tutorial, only the order in which I placed them. I drop shadow each and every layer when I do a tutorial, and sharpen when I resize so don't forget! Let's begin, shall we?

Begin by opening paper 5, shift + d, close original. Apply MB and SW Mask 39, layers>merge>group. 

Add element 86 as new layer. Image>Mirror, resize 75%.
Add frame 7 as new layer. Resize 65%. Tap blank middle areas with magic wand, add new layer, selections>modify>expand by 5 pixels and flood with paper 2, scale 70. Drag layer below frame layer. While selected, add largest image of tube (paste>new layer), position and selections>invert>on tube layer hit delete. Make sure it's above paper, but below frame layers. Deselect. 
Add word art 2 as new layer. Resize to 65%. Selections>select all>selections>float, add new layer, flood fill with white. Deselect, drag below word art layer and merge the two layers together.
Add element 3 as new layer.

Add your full tube image as new layer. Resize if desired.
Add element 86 as new layer, resize 65%.
Add name, and any effect to name desired.
Add copyright information for your artist (s)
Merge visible, copy/paste as new to crop. Save as, and you're done!
Thank you for doing this tutorial. I'm glad you stopped by. I hope to have more tutorials in the near future, so keep checking back. :)


Sunday, February 9, 2014

This Is Love


You can click the image to see it in full size :)
Thank you for taking the time to do my tutorial. I hope you enjoy it, and would love to see your results, and receive your feedback! This tutorial was written by Mellie on February 9, 2014 and is copyright to me, the way I word thing's and the images that I use. All other images are copyright to their respective owners, including tubes/art, font, scrapkits and templates and should not be used without purchasing or written permission, nor without reading their terms of use. This tutorial is for education purposes only and is in no way intended to be used as any other purpose. This tutorial was written with the tube and kit in mind that is being shown, therefore, you may have to adjust your setting's should you choose to use images not suggested here, in this tutorial. For this tutorial, you will need several things. Paint Shop Pro (I am using version X), and a good working knowledge of how to operate it, masks, layer palettes, custom selections and plug-in filters.


For this tutorial you will need the following:
PSP X (or similar version)
Tube by PinupToons

Scrapkit by Rebel Dezigns - What Love Is - Mini Kit
Font of choice. I am using - Pussycat
Vix Valentine Mask 2
Distort - Radial Zigzag filter


Open paper of choice, I am using paper 1. Shift + D, close original. Apply Vix Valentine mask 2, layers>merge>group. Image>resize>85%. 
Copy/paste element 6, the heart, as new layer. Change your blend mode to hard light. Add drop shadow of choice. Copy/paste your tube as a new layer. Add drop shadow of choice. Move to left. Duplicate this layer, add distort radial zigzag with these settings: 0, 122, 124. Click ok. Drag beneath your top tube layer, set your blend mode to soft light. Move the top tube down and to the left just a bit.
Add elements 2, 8,10, 24, 27 and the wordart. Resize according to preference and drop shadow each layer. Use my tag above as a guide on placement and sizing :)

Thank you for doing this tutorial. I'm glad you stopped by. I hope to have more tutorials in the near future, so keep checking back. :)

Wednesday, January 22, 2014

What A Girl Needs


Thank you for taking the time to do my tutorial. I hope you enjoy it, and would love to see your results, and receive your feedback! This tutorial was written by Mellie on January 22, 2014 and is copyright to me, the way I word thing's and the images that I use. All other images are copyright to their respective owners, including tubes/art, font and scrapkits and templates should not be used without purchasing or written permission, nor without reading their terms of use. This tutorial is for education purposes only and is in no way intended to be used as any other purpose. This tutorial was written with the tube and kit in mind that is being shown, therefore, you may have to adjust your setting's should you choose to use images not suggested here, in this tutorial. For this tutorial, you will need several things. Paint Shop Pro (I am using version X), and a good working knowledge of how to operate it. You will also need this IB scrapkit made by talented Monti. The tube by Pinup Toons, which can be purchased here. Please do not use artist's work without purchasing! You'll also need a font of choice. This mask, and this mask, which is WSL340 by Weescots Lass :)

Let's begin, shall we? :)
Open a new, transparent canvas, 800 pixels by 800 pixels. Open both of the masks. Flood fill your blank canvas with paper 4, the pink one, and add WSLMask 240. Merge group in your layer palette. Add another new layer and flood fill with paper 5, add mask 
0mask046_LT. Merge group in your layer palette. Close the masks. Open Monti's frame 1 and copy/paste as a new layer onto your canvas. Resize if needed. Using the magic wand tool, select the inside of the frame, Selections>Modify>Expand by 1 pixel, add a new layer, and fill with paper 4. Move this layer below the frame layer. Open element 23 and paste as a new layer, while still selected, selections>invert and on element 23 layer, tap delete on keyboard. Resize as needed. Open element 22, copy/paste as a new layer while still selected, selections>invert and on element 22 layer, tap delete on keyboard. Resize as needed, sharpen and add drop shadow. Deselect this layer, and duplicate>Image>Mirror>Image>Flip. Add your tube, making sure she is the top layer. Try to line up her legs so that she blends in with the frame as shown below.


Resize as needed, sharpen and add drop shadow to the tube layer. Add remaining elements as shown, resizing as desired. Sharpen and add drop shadows on each layer.
Add name and copyright information. Merge and save!
Thank you for doing this tutorial. I'm glad you stopped by. I hope to have more tutorials in the near future, so keep checking back. :)