Out Of This World Tutorial
Thank you for taking the time to do my tutorial. I hope you enjoy it, and would love to see your results, and receive your feedback!
This tutorial was written by Mellie on March 7, 2015 and is copyright to me, the way I word thing's and the images that I use.
All other images are copyright to their respective owners, including tubes/art, font, scrapkits and templates and should not be used without purchasing or written permission, nor without reading their terms of use.
This tutorial is for education purposes only and is in no way intended to be used as any other purpose. This tutorial was written with the tube and kit in mind that is being shown, therefore, you may have to adjust your setting's should you choose to use images not suggested here, in this tutorial.
For this tutorial, you will need to know several things. Paint Shop Pro (I am using version X), and a good working knowledge of how to operate it, layer palettes and plug-in filters, masks, templates...etc. I will also assume that you add your desired drop shadows to each and every layer. You can click on the image to see it full sized.

For this tutorial, you will need the following items:
Paint Shop Pro, I am using version X
Out Of This World PTU Scrap Kit by Monti's Scraps
Font of choice, I am using Heavy Data
Forum Mask 16: MB and SW. She has some wonderful FB timeline masks as well that would also work wonderfully.
AAA Foto Frame plug in filter
Muras Copies filter.
Let's begin, shall we?
Create a new, blank canvas in psp. It needs to be 851 wide pixels by 315 pixels high.
Flood fill with paper 8, at 120% size. Apply the mask INVERT checked, and merge group layers. Lower the opacity to something between 75-80%.
Close the original paper.
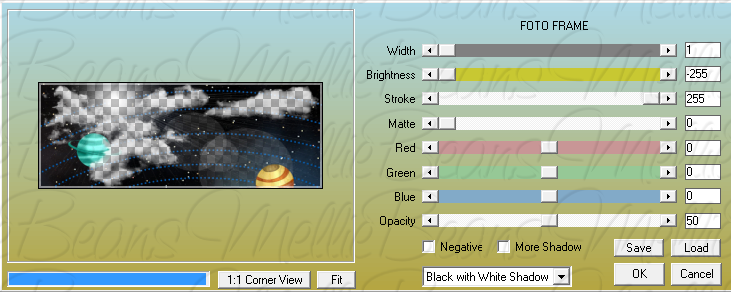
Apply the filter Foto Frame with the following settings: (you can see it full size by clicking the image)
Open element 18. Copy and paste onto your canvas, close the original.
Resize the element to 45% of it's original size. Using the tool, rotate go to "Image>Free Rotate>Right ticked off>Free ticked off>type 25.00 and click ok.
Now click "Adjust>Sharpness>Sharpen. Drop shadow your layer, and move it close to the left side of the canvas, near the planet on the paper layer.
Open element 16. Copy and paste onto your canvas, close the original.
Resize the element to 45% of it's original size. Now click "Adjust>Sharpness>Sharpen".
Drop shadow your layer.
Open element 45. Copy. Click your background layer, and paste as a new layer. Resize this element to 70% of it's original size. Leave in place.
Open element 23. Copy and paste onto your canvas. Resize this element to 80% of it's original size. Now click, "Adjust>Sharpness>Sharpen". Drop shadow your layer and leave in place.
I want to add something to the bottom, it's force of habit. I like the way that looks, when I see a timeline set. So, let's build the bottom up a little :D
Open element 49. Copy and paste it as your top layer. Using your pick tool (press K on your keyboard) stretch it so that it meet's the edge's of the canvas. Move it down to the bottom as desired. Drop shadow your layer.
Open element 42. Copy and paste, drag layer below element 49 layer. Resize to 25% of it's original size. Now click, "Adjust>Sharpness>Sharpen". Apply Muras copies filter. On the drop down menu, choose line. Type 7 in the "Number" box, leave everything else default and click ok. Drop shadow your layer.
Open element 59. Copy and paste as a new layer. Using the pick tool, stretch to meet the edges of your canvas. Click "Adjust>Sharpness>Sharpen", repeat. Drop shadow your layer. Drag below the top layer, so that this is your second layer.
Open the wordart. Copy and paste it as a new layer. Using your pick tool, size it down as desired. Drag this below the satellite image layer (element 18). Drop shadow your layer. Move it to the top left of the canvas.
Now you'll need to add your name and any copyright information for the kit, and/or tube should you choose to use one.
Don't close it yet, though. We need to make our matching avatar, for your profile picture.
Avatar size should be 180 pixels by 180 pixels.
Create a new, blank canvas of that size.
Go back to your timeline banner image.
I always try to use the area of the timeline that would be covered by the profile picture.
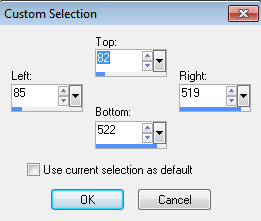
So once you have an area chosen, get your selection tool (make sure it's set to rectangle) press and hold the mouse over the area of the timeline cover that you want to use for your avatar. If you watch below on the status bar it will tell you how big the area is that you're selecting. It takes a bit of practice, but you can do it. Once you have the area large enough to fill the 180 X 180 canvas, simply let go of the mouse and copy it. Paste it onto your blank canvas.
Now, using the same font you used for your timeline banner, add your first initial.
That is all! You're done , Merge all layers visible and save!
Thank you for taking the time to do my tutorial. I hope to offer more in the future, so keep checking back!